Site · Assets
Upload and organize your files
Last updated 18 November 2026
Upload files to Assets, sort them into folders and tag them so you can find them later.
When you finish this guide, your files are on your site, sorted into folders and tagged so you can find them in seconds.
You work in Assets > All Assets. The folder tree is on the left, the files in the selected folder are in the middle, and the details of the selected file are on the right.
Create a folder
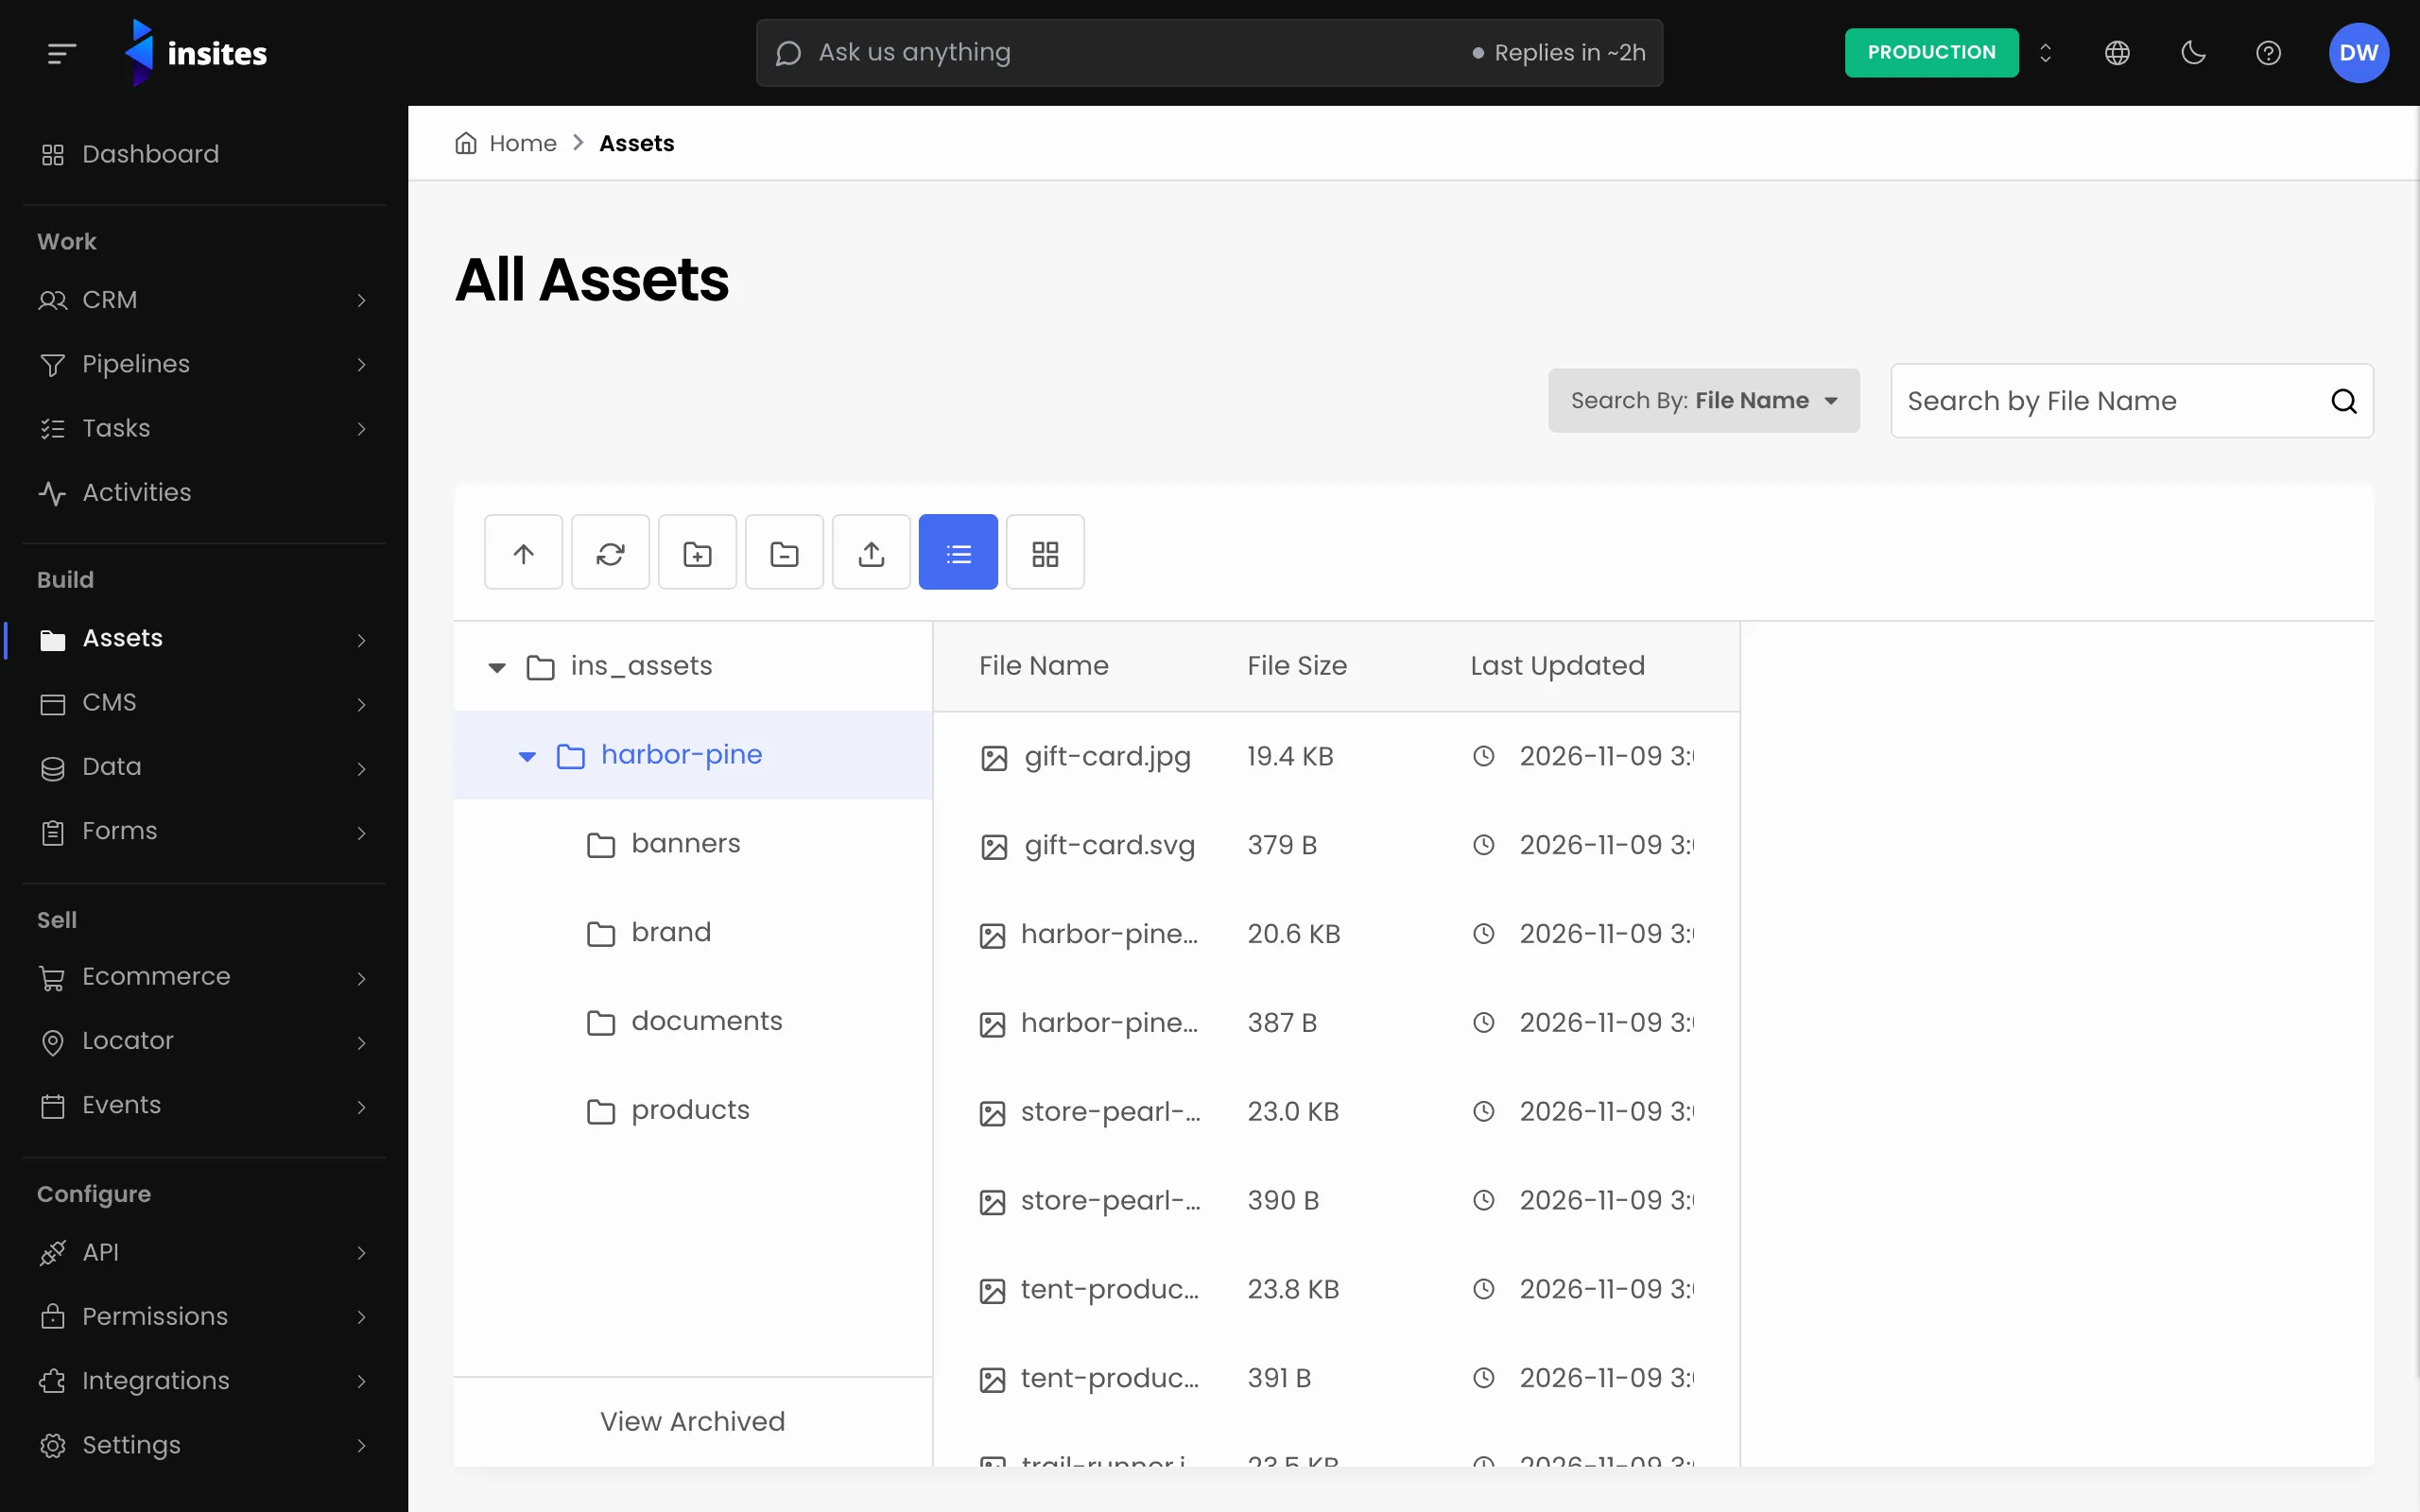
- Go to Assets > All Assets.
- In the folder tree, select the folder that should hold the new one.
- Click Add Folder in the toolbar.
- Type a Folder Name and click Add Folder.
Spaces, slashes and the characters : * ? | in a folder name become hyphens, as do double quotes. For example, Team photos becomes Team-photos.
Upload files
- Select the folder you want the files in.
- Click Upload in the toolbar.
- Add your files in the Attachments area.
- Click the upload button at the foot of the drawer.
You can upload up to 100 files at a time. Each file can be up to 600 MB, unless an administrator has set a lower limit or blocked that file type. See Set what people may upload.
Warning
If a file with the same name is already in the folder, the drawer lists it and asks you to confirm. Uploading replaces the existing file. If the file with that name is archived, uploading restores it and replaces it.
Upload is turned off while the modules folder is selected.
Tag files
Tags let you find a file wherever it sits in the folder tree.
- Select a file.
- Click Edit Tags in the toolbar.
- Add one or more tags, then click Save.
Find a file
Use the search bar above the file list. Choose File Name to search by name, or Tags to search by tag across every folder.
Tidy up
- Archive File moves a file out of the way. You can bring it back later with Restore File.
- Delete File and Delete Folder remove files for good. You type
DELETEto confirm.
Danger
Deleting a folder also deletes every file and folder inside it. There is no undo.