Getting Started · Using Insites
Set up your CRM
Last updated 18 November 2026
Add companies and contacts, link them, set categories and custom fields, and log activities.
The CRM is where you keep the people and companies you deal with. This guide takes you from an empty CRM to a usable one: you add companies and contacts, link them, log what happens, and add the fields your business needs.
You need to be an administrator of the site.
Add your companies and contacts
In the admin, go to CRM > Companies and select Add Company. Then go to CRM > Contacts and select Add Contact. Each form has tabs, such as Details, Addresses and Custom Fields. Fill in what you know and select the add button at the end.
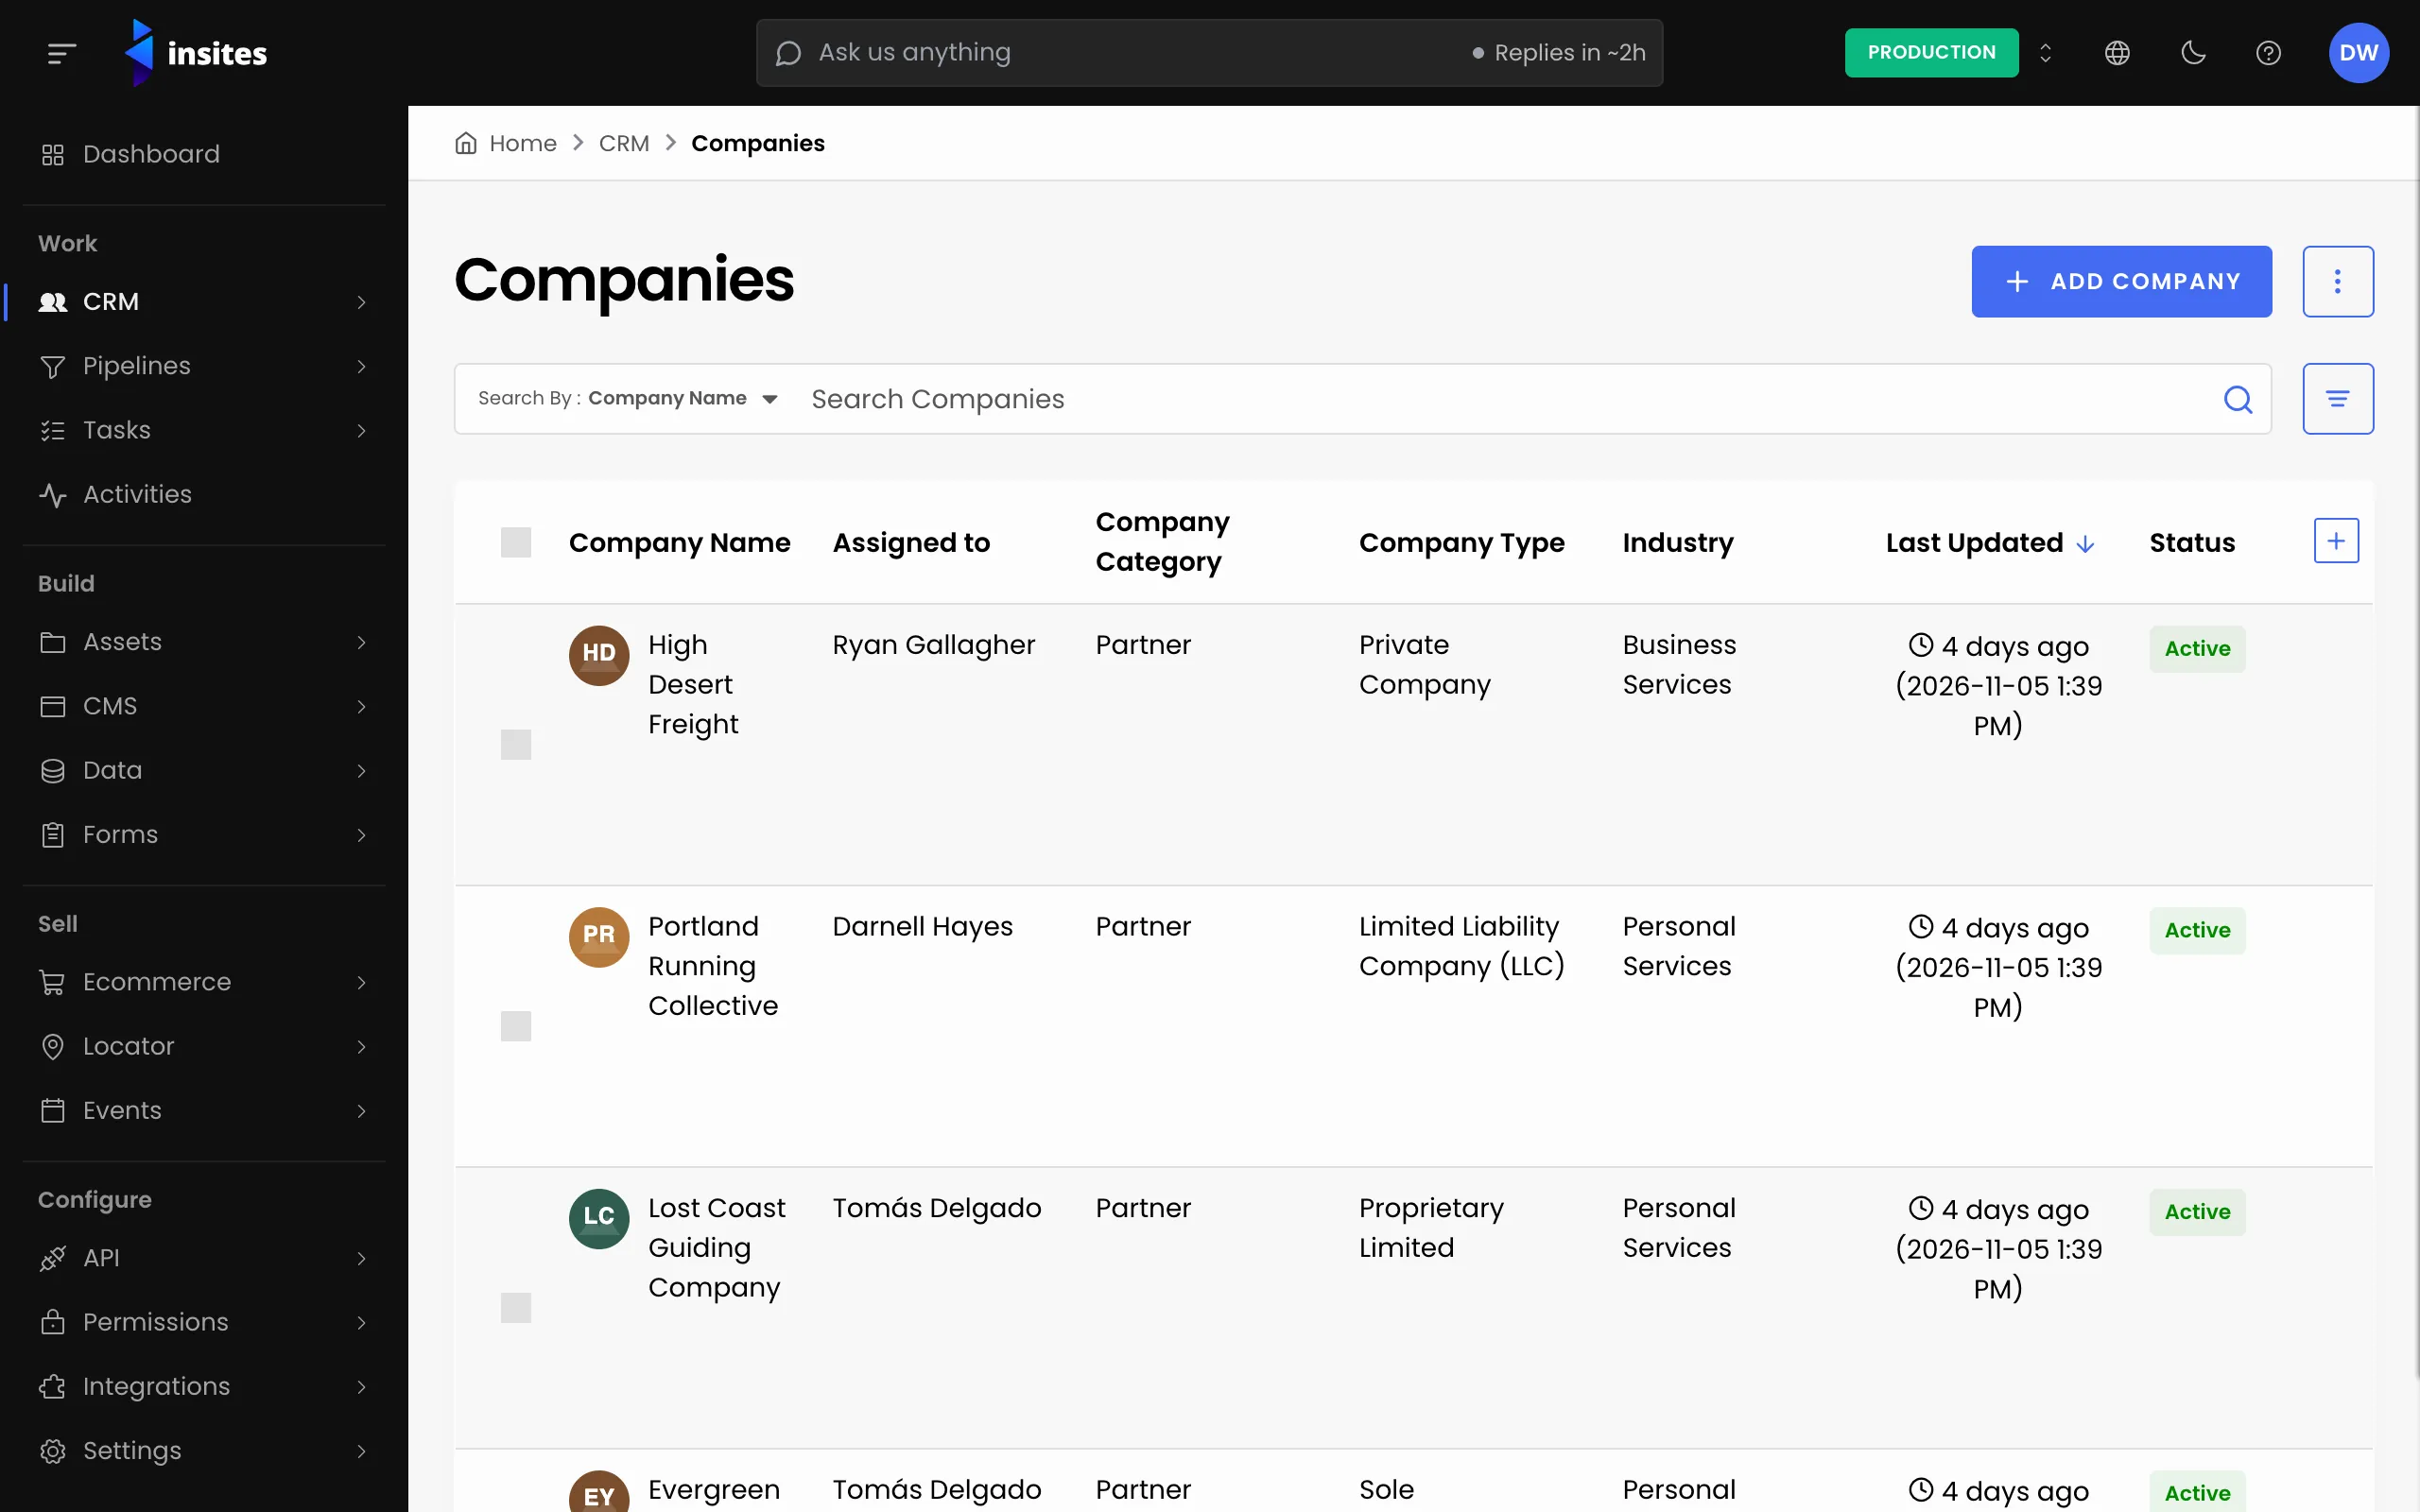
If you already have a list in a spreadsheet, import it instead. On the Contacts page, open the menu at the top right and choose Import Contacts. The Companies page has Import Companies in the same menu. See Import contacts from a spreadsheet.
Link contacts to companies
A contact linked to a company shows on the company's record, and the company shows on the contact's. Pick the company in the contact's Company field, or open the company, select its Contacts tab and choose Assign contacts. See Link contacts to companies.
Note
The contact import ignores the Company Name column. Import first, then make the links.
Set the categories and lists
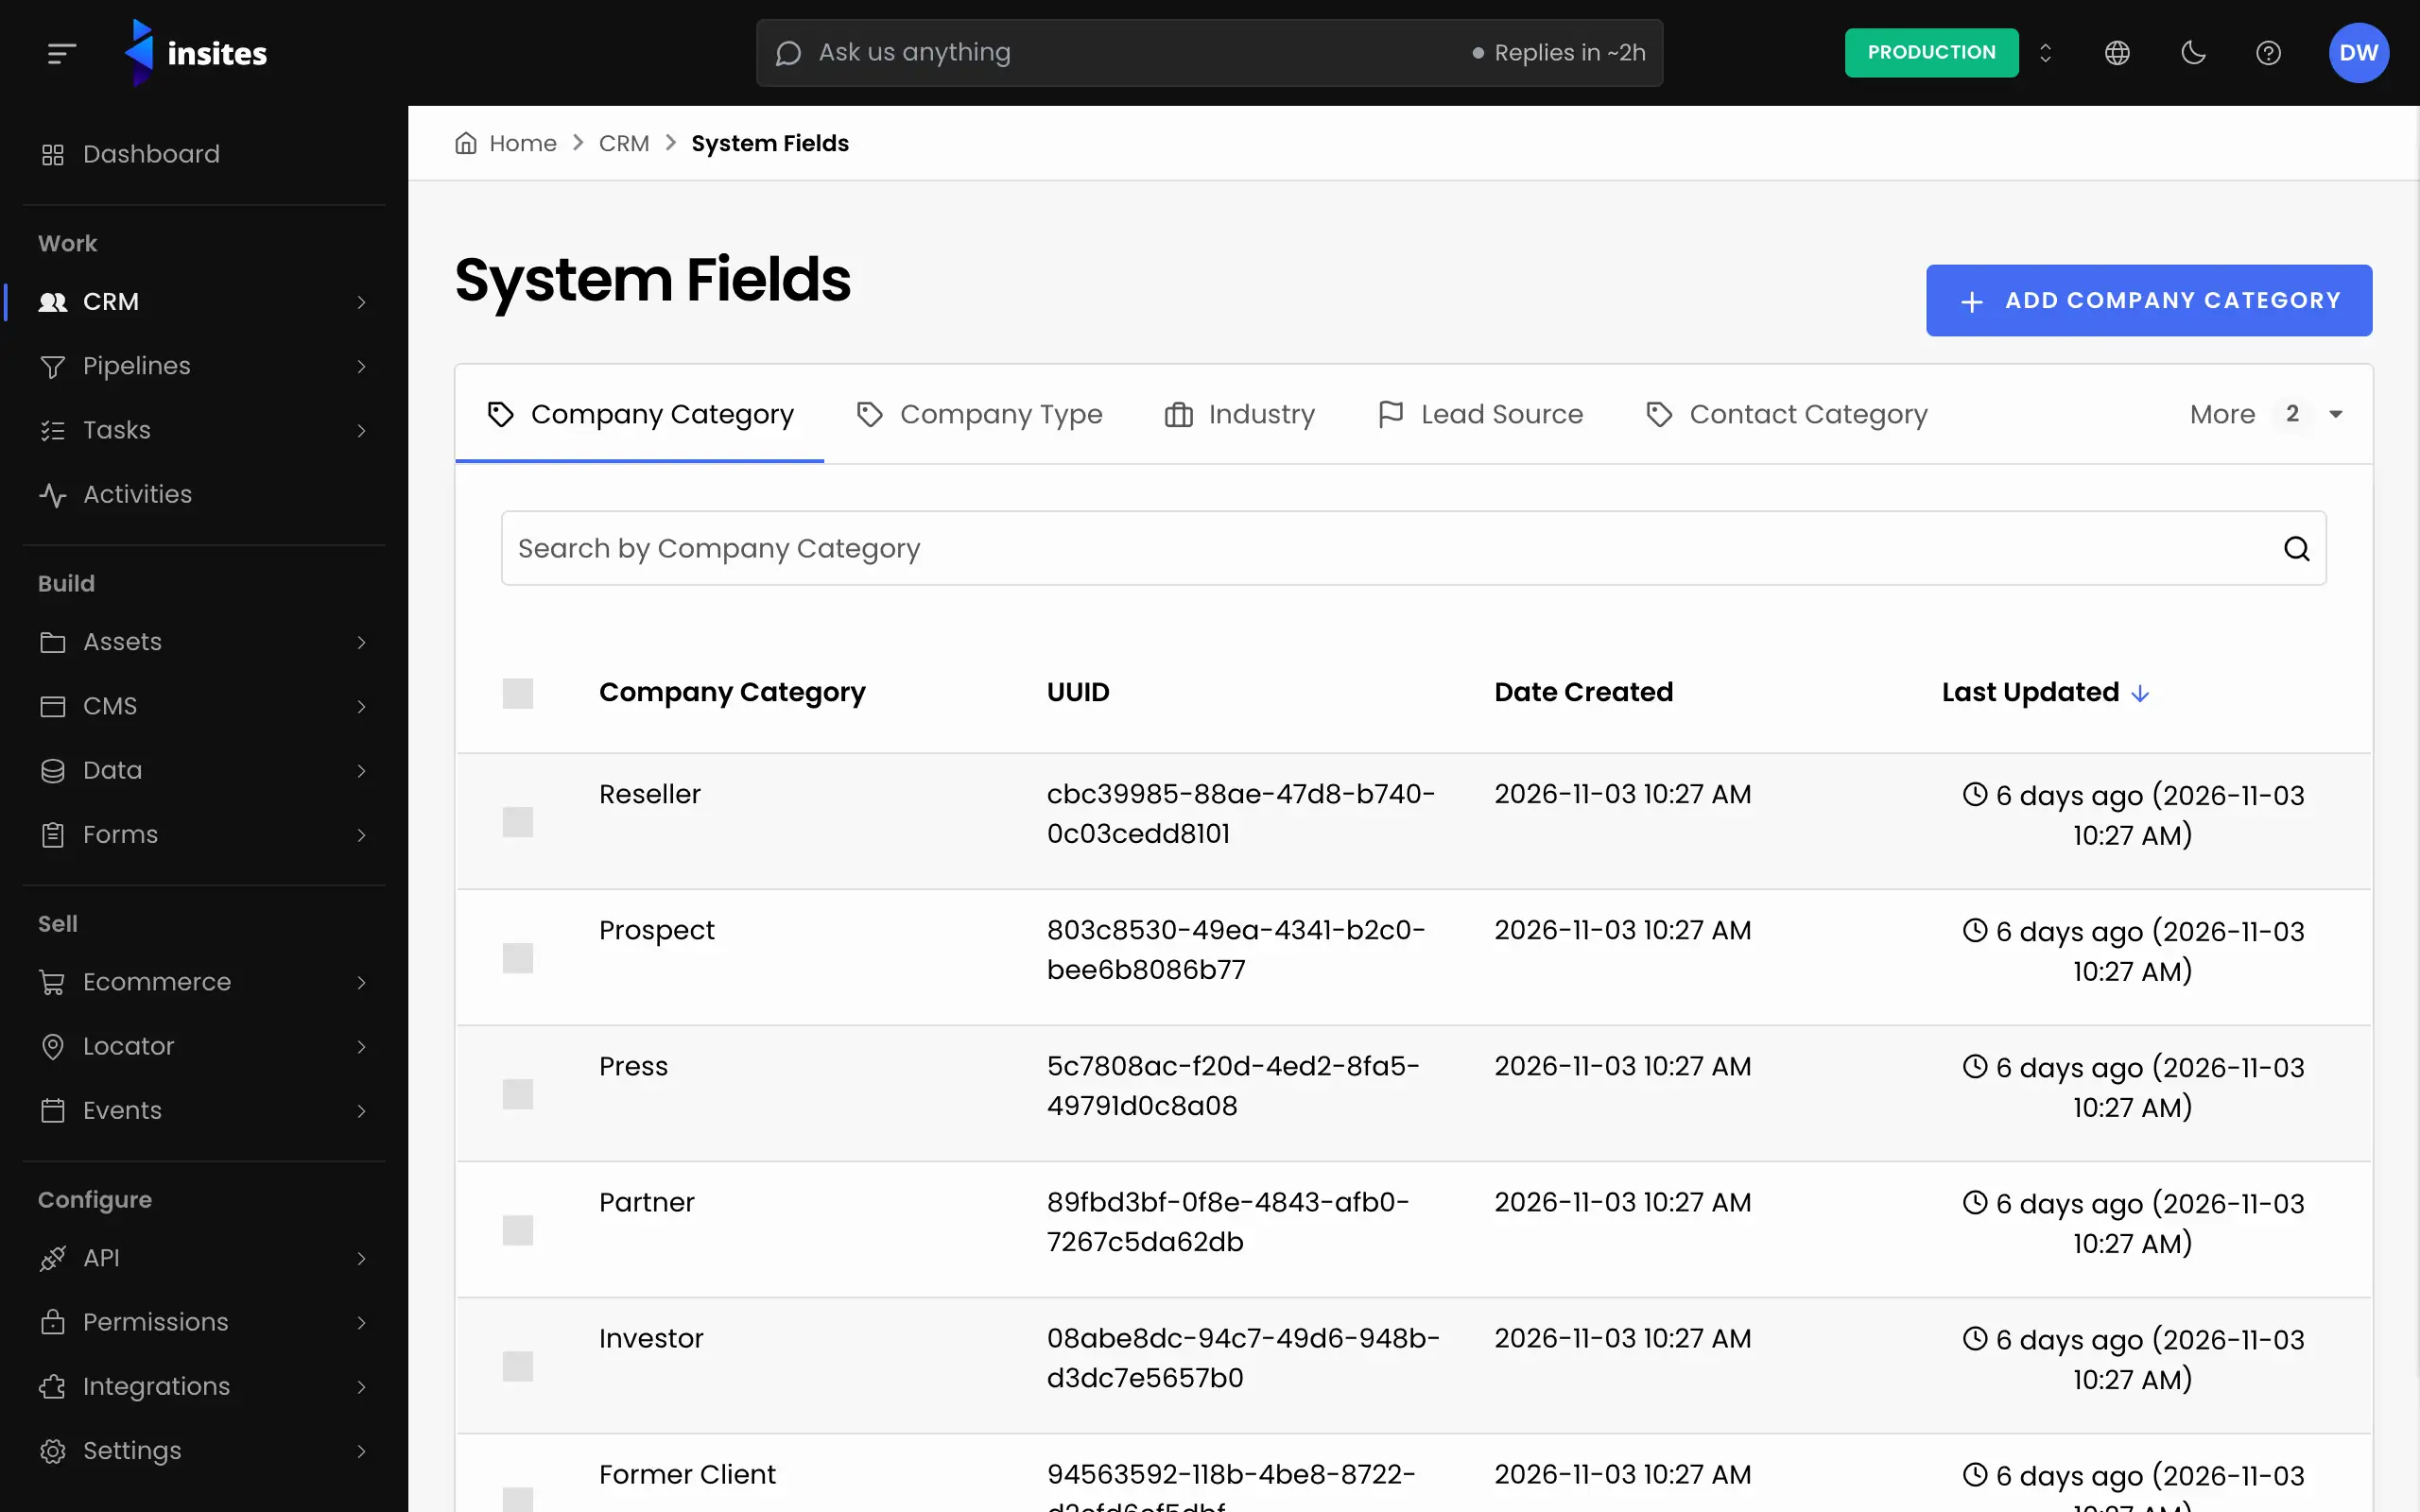
Go to CRM > System Fields. It holds the lists behind the dropdowns on your records: Company Category, Company Type, Industry, Lead Source, Contact Category, Contact Type and Relationships. Add the values your team uses, for example a Lead Source called Website Enquiry, so everyone picks from the same words.
Add your own fields
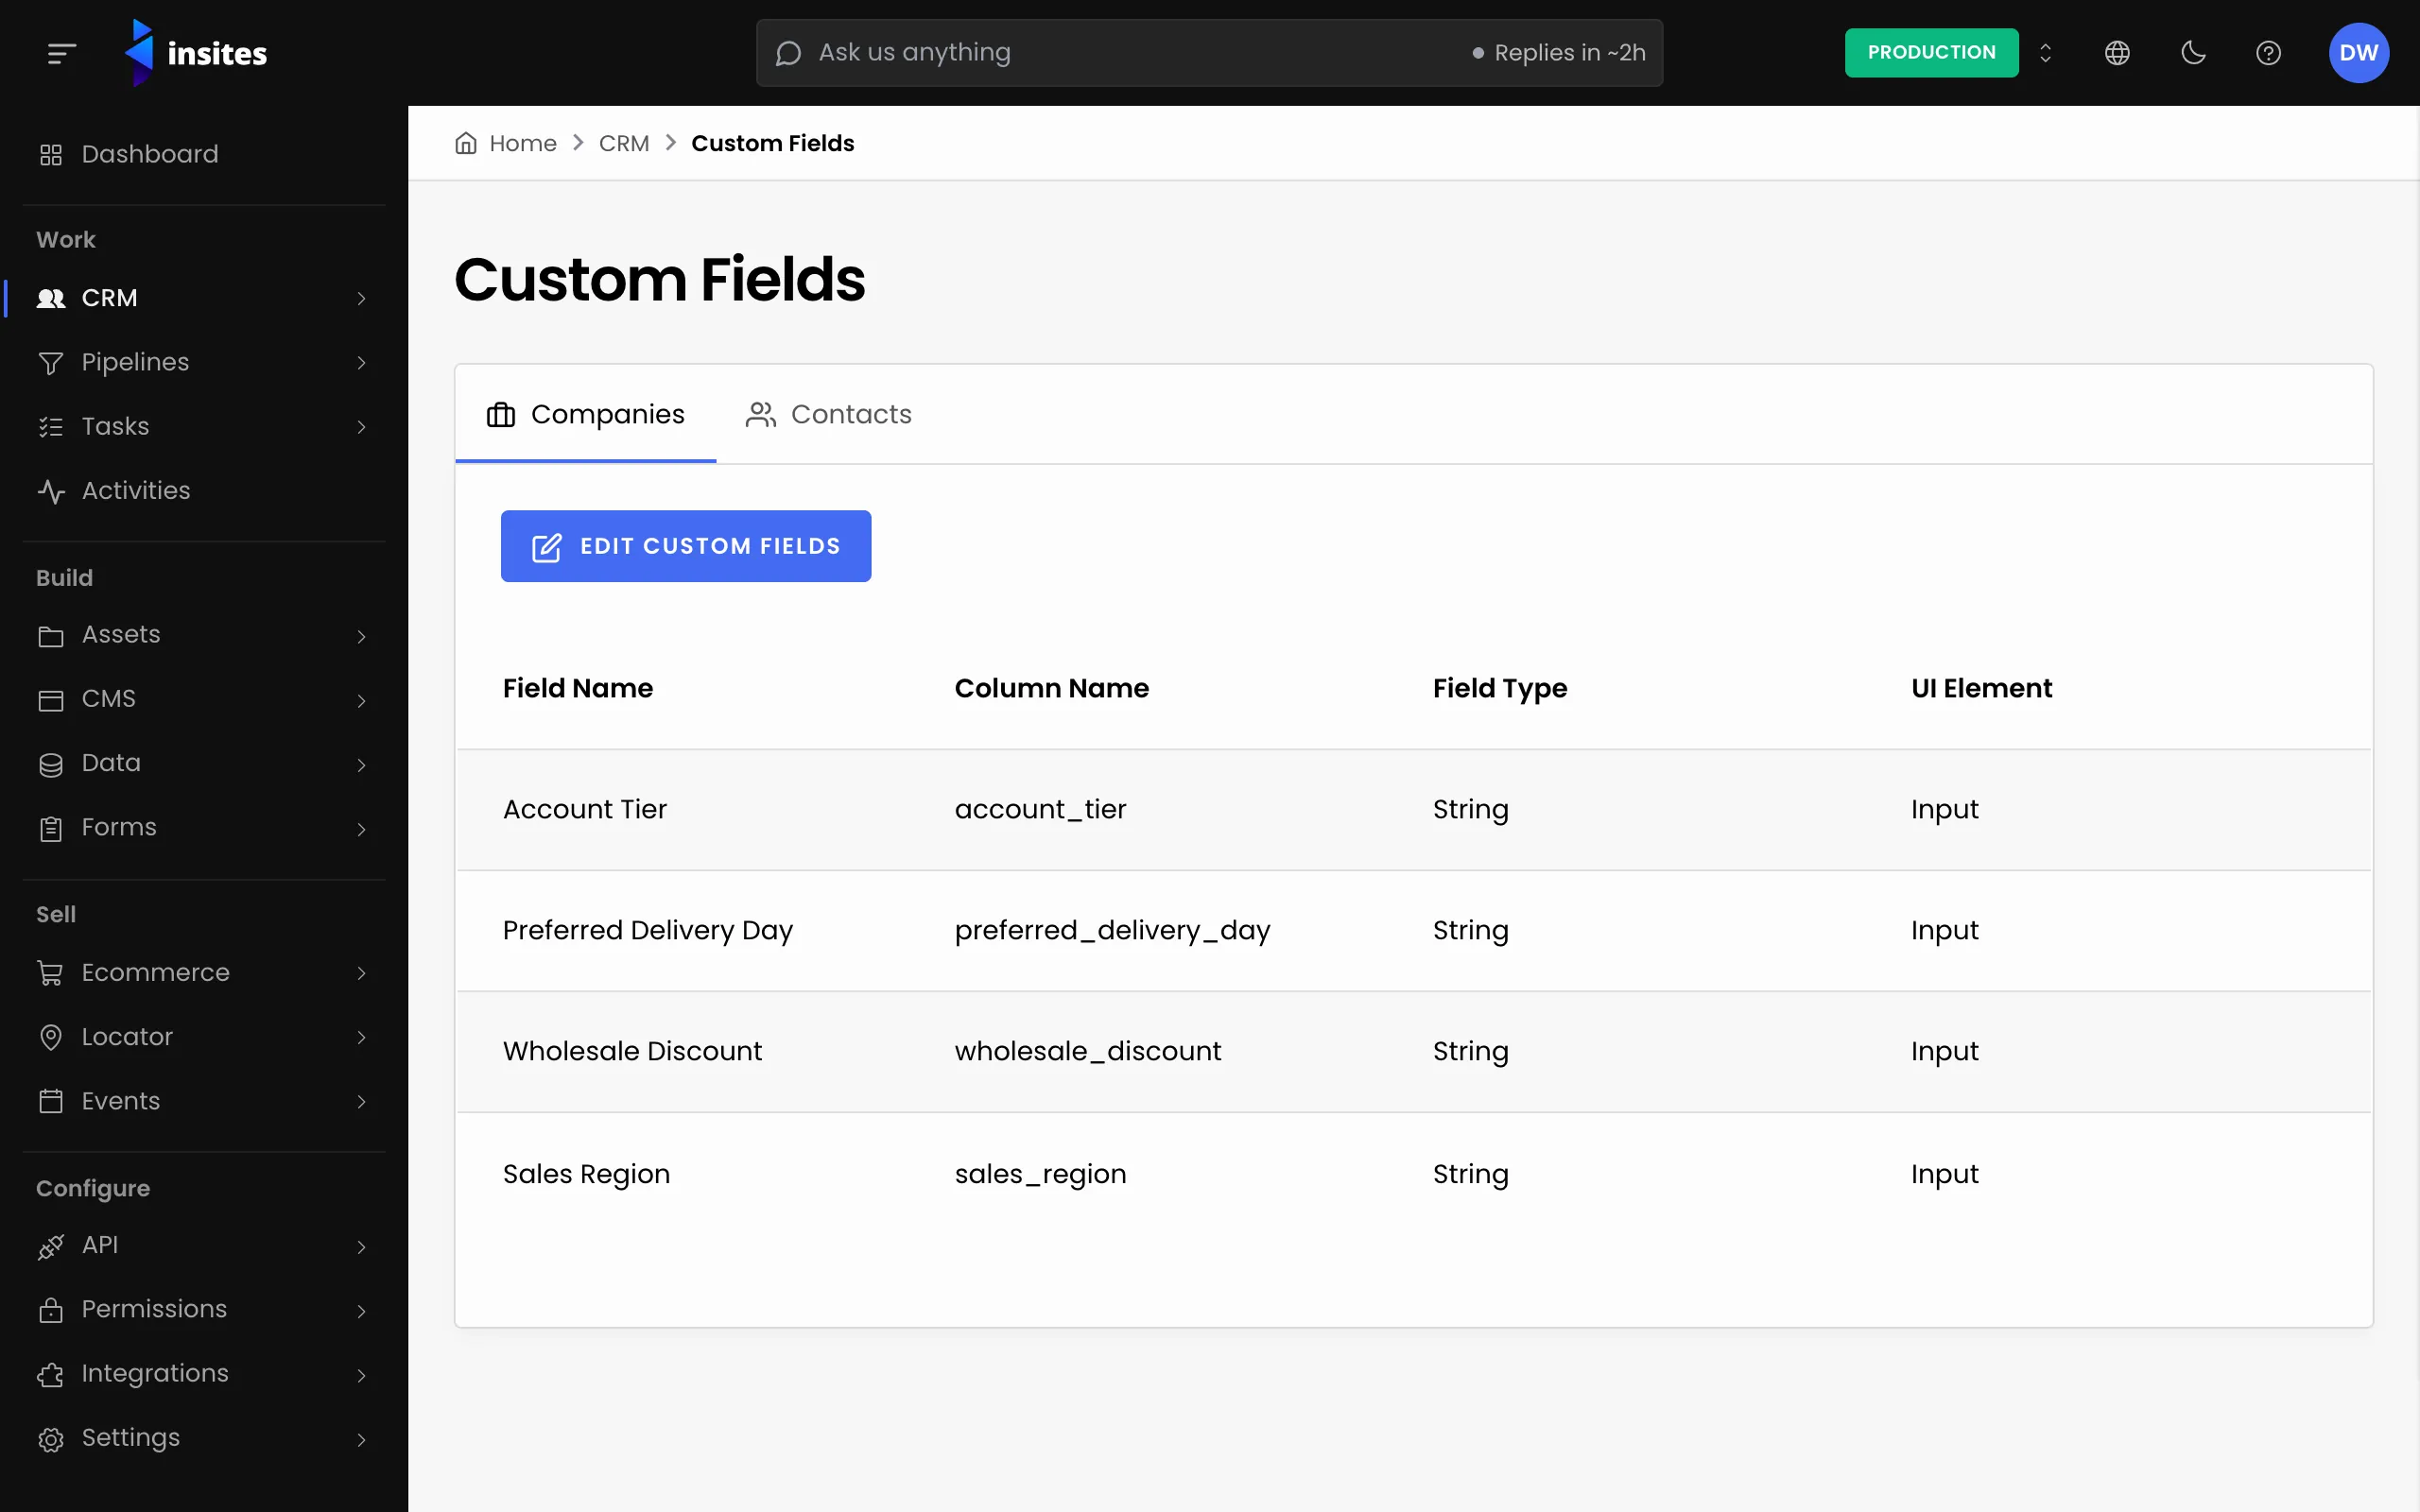
Go to CRM > Custom Fields. Contacts and companies each have a tab. Select Add Custom Field, name it, choose its type and how it looks on the form, then select Save Field and Save. See Add custom fields to contacts.
Warning
You cannot change a field's type after you save it. Choose the type with care.
Log activities and follow-ups
Open a contact and select its Activities tab, then Add activity. Choose a type, such as Call, Email or Meeting, and add a subject and notes. To set a reminder, use the Tasks tab and Add task. Tasks > My Tasks lists the tasks assigned to you. See Log activities and follow-ups.
Check your work
- Open a company and confirm its contacts are listed.
- Open a contact and confirm its activity appears on the timeline.
- Open the Custom Fields tab on a contact and confirm your new field is there.
Related
- CRM overview: what the module holds
- CRM guides: every step-by-step guide
- Set up your sales pipeline: track deals for your contacts
- CRM system fields: the lists behind the dropdowns
- Connect to CRM: save form submissions as contacts